Showing posts with label Cakes. Show all posts

Friday, June 29, 2012

Banana Walnut Streusel Pound Cake


Salam all,

Helllloooooo people ;) Yup another update from this mental blogger :ppp.  Yeah I admit that I am mental cos if I am in the mood to bake and update, I will be doing it regularly.  Otherwise, u'll see me dissapear for a few weeks or months maybe....hehehez.  Please, please I beg u not to miss me when I am gone *wahahahaz....how shameful is that statement* pukes!!!  I think I am little crazy today....please bear with me haizzzz hormones, hormones.


Anyway let me tell u a little story abt this cake.  This is the first time ever that I am left with no eggs in the fridge ~ another sign of old age.  I usually will buy 2 types of eggs, one is free range for our sunny side up and a tray of eggs that consists of 30s for baking bcos they are cheaper.  After that I will transfer the 30s egg into 2, dozen cartons and stack the rest of the eggs on top of  the cartons and keep them in the fridge.  This way, I can save some space in the fridge.  I thought I had a total of 18 eggs when I decided to make the pandan chiffon last Wednesday but lo and behold, the bottom egg carton was empty.  Thus after making the chiffon I am left with only 2 eggs.  I have yet to get my *$* to the supermarket to get more eggs.....lazy, plus its too cold plus I didnt have the car today as hb was using it for work and I can list more reasons if I want to but naaahhh let me stop here hehehez.


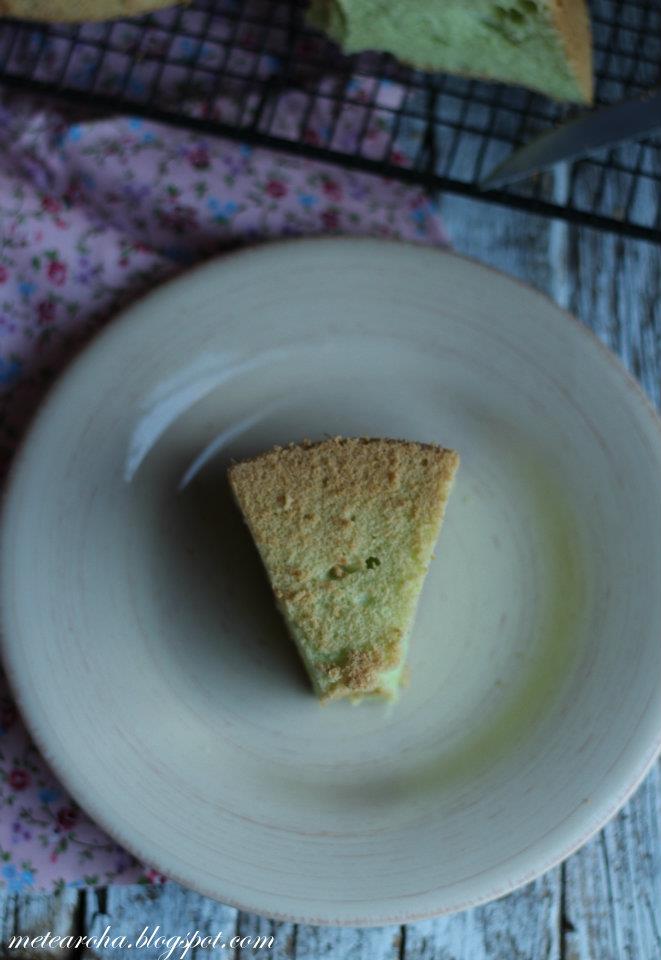
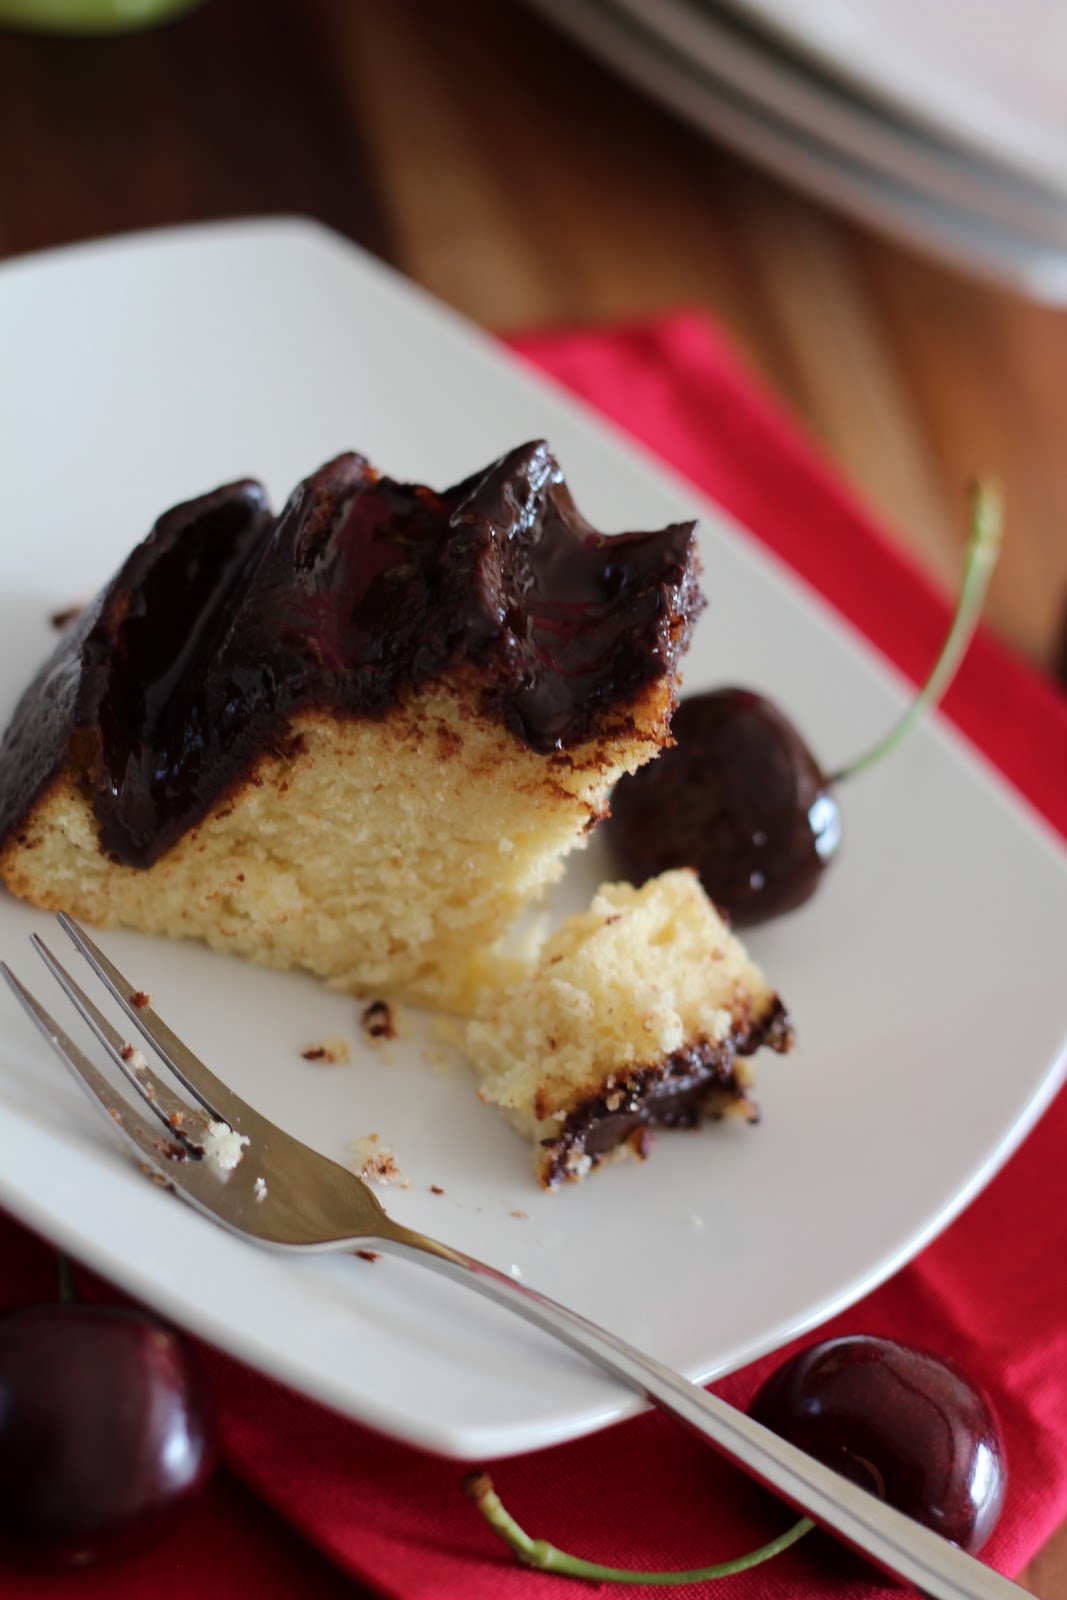
This pound cake recipe, I have bookmarked ages ago and I have used the streusel recipe the other time when I made the feijoa streusel muffins.  The recipe is perfect as it calls for 2 eggs.  I know I can search for eggless recipes but why bother since I am all set to bake this yummy pound cake :ppp.  And.....I was also left with one lifeless banana that was exactly 100g, the signs for me to bake this cake were there thats why I shall not wait anymore.  The cake was a perfect size for us and it was so moist apart from the struesel topping falling apart when I tried to slice it.  Guess what.....I didnt waste a single crumb of the struesel, too crunchy and yummy to waste them.  Maybe that's why I am a little crazy today, I probably am a little sugar high......I had 2 fat slices of this cake yumzz yummzz and I want MORE!!! :D


Source : Happy Home Baking
Adapted from : 贝太厨房 and 欧陆点心&磅蛋糕 (Don't ask me how to pronounce or read this :ppp)


Banana Walnut Streusel Pound Cake
Ingredients
(makes a 18cmx8cmx6cm pound cake)

100g unsalted butter, room temperature
65g icing sugar, sieve
2 eggs, room temperature, lightly beaten
1 teaspoon vanilla extract
100g banana, mashed
125g cake flour
1 teaspoon baking powder

50g walnuts

streusel:
25g unsalted butter, room temperature
25g icing sugar, sieve
25g cake flour


Method:
To make streusel, place butter, icing sugar and cake flour in a bowl. With a fork, mix together the ingredients to form a soft dough. Leave in the fridge to chill.
Break walnuts into pieces, place in a baking tray and toast it in a preheated oven at 100degC for 10mins. Set aside to cool.
Line pound cake pan (18cm x 8cm x 6cm) with baking paper, set aside. Sieve flour and baking powder together, set aside.
Place butter in a mixing bowl. With a handheld electric mixer, beat the butter for a few seconds on medium speed. Add half of the icing sugar and continue to beat till the sugar is incorporated into the butter mixture. Add the remaining half of the icing sugar and continue to beat till the mixture turns pale, light and fluffy.
Dribble in the eggs gradually, about 1 tablespoon at a time, each time beat at low speed till incorporated into the mixture before adding. This step is important to prevent the batter from curdling. Even though some flour can be added to the batter to stop it from curdling, the texture of the cake will be affected. (Note: always use room temperature eggs to prevent curdling.)
Add in the vanilla extract and the mashed banana. Fold with a spatula till just incorporated. Do not over mix as it may cause the batter to curdle.
Sieve over the flour and baking powder mixture. Fold in the flour mixture with a spatula. Once the flour is incorporated into the batter, continue to fold for 1 to 2 mins until the batter appears smooth and glossy. This step is important so that gluten in the flour will be formed which will help the cake to rise and expand during baking.
Pour finished batter into prepared pan. Spread batter and smooth top. Sprinkle the walnut pieces on top. Lightly press into the batter with spatula.
Remove chilled streusel dough from fridge. Grate the dough over the top of the batter. Work quickly as the dough will soften very fast (especially on hot days).
Bake in pre-heated oven at 170degC for 25 mins. Remove pan from oven and make a slit with a wet knife (dipped in water) across the middle. Return to oven and continue to bake for 35 - 40mins until a skewer inserted into the centre comes out clean, and the top is golden. Unmold and leave to cool completely. Store in air-tight container or wrap in cling wrap. Pound cakes are best eaten the next day.


The moon was sighted at abt 3.30pm ish when I took this photo.  The skies were clear and it has been warm today.  One thing abt clear skies and warm day, it means that is gonna be a chilly night.  Hb said that it will be a -3 deg C but I checked on the net and it stated 1 deg C.  To everyone down under....keep warm and to the rest of the world....enjoy the weekend.  TTFN ;)


Wednesday, June 27, 2012

Pandan Chiffon Cake


Salam all,

This morning I couldnt decide if I should make a traditional Malay kuih....putri salat or pandan chiffon cake. Well, I chose the latter as I have forgotten to soak the glutinous rice overnight which is required in the recipe.  I know that I can just soak the glutinous rice for a few hours but I dont think the one and only packet of coconut milk in my pantry will be sufficient for me to make the kuih either.

This is the first time for me to use the real pandan juice for my baking.  I really like the pandan aroma wafting from the oven and I told myself just now that I will use the the real pandan juice from now on (that's if I am not lazy :ppp)  One thing I noticed abt using the pandan juice is that there is no bitterness like when I am using the pandan essence.  The only thing I am dissapointed with my cake is, it collapsed while it was in the oven.  I only realised my mistake right now while copying the recipe to my blog.....it was bcos the recipe calls for SELF RAISING FLOUR!!!  What did I use??  All purpose flour of course....DOH!!!  Ohhh and another thing that I am still having problem when baking chiffon is the large holes in the cake.  Haiiizzz chiffon....chiffon, I've yet to master u bleeaarrggghh!!!


Luckily I only made half of the recipe and for everyone's info.....the cake is gone, finished, no more...habis.  Jannah ate more than half of the cake.  She kept on asking me if she can have the cake right after I took it out of the oven.  When I told her that it needs to be cooled she said that all she wanted was a tiny bit of the cake, sized of a crumb.  I shooed her away hehehehez.  When I took out the cake of the mould and wanted to photo it....she came again asking for a slice.  I gave her a slice and the slice grew into half a CAKE and more.  Oh well, I am glad that the cake is gone cos one thing for sure, hb is not gonna eat it and Jannah has the tendency of wanting to eat freshly baked cakes only.  If I were to give the same cake to her tomorrow, she will say that it is yucky.....aiyayayay :D


Source : PickYin @ Life is Great

Pandan (Screwpine) Chiffon Cake
Recipe from my mother's friend, original source unknown, makes a 25cm 5-inches tall cake.


These are PickYin notes that I've copied from her blog.  Thank you for the info PickYin.
Notes: I didn't have any self raising flour as I don't often bake with it so I made my own by using 180 grams all-purpose flour, 2 tablespoons baking powder and a ¼ teaspoon salt, based loosely on the conversion method at Deb's Smitten Kitchen. This recipe has over 80% of flour over liquid ratio so it is a very stable chiffon. It is kept soft and moist with the equal amount of egg yolks used as opposed to the whites.

I realized after speaking to a few friends wanting to make this cake that many do not own a 25cm bundt or angel food cake tin. There are two ways you can handle this situation without getting a bigger tin. The first is to make the entire recipe, pour enough batter into ¾ of your tin and bake the rest in lined muffin tin(s) for about 30 minutes. The muffin-sized cakes will be more dense but will still be great. Alternatively use the following tin size-number of eggs conversion to modify the recipe.

14cm tin - 1 egg
17cm tin - 2 eggs
21cm tin - 4 eggs
23cm tin - 6 eggs
25cm tin - 8 eggs

For the ½ cup pandan leaf juice:
10-12 pieces pandan leaves *
3-4 tablespoons water
2 tablespoons coconut milk (optional) **

For the flour batter:
180 grams self-rising flour
100 grams castor sugar
8 egg yolks
6 tablespoon corn oil
¼ tablespoon baking of soda

For the meringue:
8 egg whites
100gm castor sugar
½ tablespoon cream of tartar


Pre-heat oven to 170°C and position a wire rack at the lower third rack. Prepare a clean 25cm chiffon cake tin, do not grease.

Wash and cut the spears of pandan leaves into ½ inch pieces. Place into a blender and add 3 tablespoons of the water. Blend to form a thick paste, add another tablespoon of water if it is difficult to blend. If you have a mortar and pestle, pounding the leaves will be easier and less water will be required. Remove and squeeze out all the liquid from the paste through a fine strainer. You should be able to yield close to ½ cup of liquid. To top up and make exactly ½ cup, you can either add some coconut milk, which will go nicely with the pandan flavor, or add more water.

Sift the flour and baking soda into a small bowl. In a separate large mixing bowl, whisk the egg yolks with the corn oil to form an emulsion. Add the pandan leaf juice or pandan leaf juice plus coconut milk mixture. Mix well before adding the sugar and whisk till sugar has melted. Pour the mixture into the dry ingredients and whisk well into a smooth batter, there should be no lumps. Set aside.

On high speed of a stand or hand held mixer, whisk together the egg whites and cream of tartar. Start adding the sugar once the egg whites begin to foam, gradually in 3 additions. Beat till the meringue is smooth and glossy, with stiff peaks. Be careful not to overbeat the egg whites.

Immediately stir in approximately 1/3 of the meringue into the flour batter. With a flexible rubber or silicon spatula, fold in the meringue gently and mix well. Once a roughly homogenous mixture is achieved, add the rest of the meringue and repeat the gentle, light-handed folding process till the cake batter is well combined. Scoop from the bottom of the bowl to ensure no meringue or flour batter is left unmixed. Do not beat or overwork the batter as this will knock out the air you've put into the meringue.

Pour the cake mixture into the cake tin. Using your spatula, dip it into the batter right to the bottom and make circles around the tin twice. This is to remove any large air bubbles possibly trapped while pouring in the cake batter.

Bake at 170°C for 10 minutes. Lower the temperature to 160°C and bake for another 45 to 50 minutes or until cake is done. The cake tester should come out clean. Don't fret if the top of your cake cracks a little, this is normal.

Remove the cake from the oven and immediately overturn it to cool completely, up to 2 hours. I like to do this over an upturned funnel as the legs of the chiffon cake tin are not long enough to avoid the top of the cake touching its resting surface - the cake should rise to the same level or slightly higher than the center tube. You can also use a narrow necked bottle but ensure that it's stable enough to support the weight of the cake.

Release the cake by running a sharp, thin knife along the sides of the cake tin and subsequently the bottom of the tube. The cake is meant to be served upside down as it is heavier on the top - you have no idea how many times that single piece of cake toppled as we took photos.

Cake keeps well chilled in an airtight container or cling wrapped up to five days (three if using coconut milk).

* For a better recipe, I will update this amount in weight once I make the cake again (it totally escaped me on a Sunday morning). Pandan leaves can be found fresh at Asian markets. For best results use the longest and darkest leaves you can find. Where fresh leaves are not available, some Asian markets stock frozen leaves or pandan paste, which are the next best alternatives. If using the paste, dilute 1½ tablespoons with water to make ½ a cup of liquid.

** Coconut milk is optional and will enhance the pandan flavor of the cake. I used freshly squeezed first press from a few handfuls of grated coconut flesh. If using coconut cream, dilute a tablespoon of coconut cream with a tablespoon of water.


Ok that's all folks.  Do read ur recipes correctly otherwise u will end up like me @_@.  Maybe I need progressive lenses so that I can read properly haiizz signs of old age ahakkksss.  TTFN ;)


Wednesday, May 9, 2012

Strawberry Oreo Chiffon Cake


Salam to all,

Originally this recipe is called Blueberry Oreo Chiffon Cake.  I substituted the blueberry yogurt as well as the blueberry oreo to the strawberries ones.  Not because that I hate blueberries, in fact I luv all kinds of berries....they are berry yummzz hehehehez.  Its just that blueberry oreos are not sold here :( bummer aye and Jannah doesnt like blueberry yogurt, she prefers strawberries instead.  Unlike in sg, whereby u can just buy a single or two pots of yogurt at the supermarket.  Here, yogurts come in 6 or 12 x 150ml pots or in a 1 kg tub.  I didnt want the rest of the yogurts to go waste cos hb and me doesnt eat yogurt  but I dont mind using them in baking or cooking.


Many thanks to Rima for sharing this yummy recipe.  I simply cant stop eating this cake.  I was savoring it and eating it like how the ancient Egyptian rulers were eating their grapes ahakkkss.  The next moment it was gone. Blame it on the small sized chiffon pan that I own as my cake was half the size of Rima's :ppp.  I only made half of this recipe.  Jannah, like me cant stop eating this cake either....she luvs it.  For a chiffon lover like me, this recipe is a winner ;)

As for hb, whom is not a chiffon lover, did try a piece and I didnt hear any feedback from him.  Hmmzzz I know he didnt like it.  I didnt ask him if he liked it or not but packed 3 slices for his lunch today.  He rejected it huhuhu :(  I saw the cake lying around on the kitchen's bench this morning.  Nevermind more for me and Jannah bluuueekkk to chiffon haters!! :ppppp


Source : Rima @ Bisousatoi
Adapted From : Chiffon Cake Mini By Dapur Aliza


Ingredients
6 egg yolks
100g strawberry yogurt
150g flour - i used cake flour
4g baking powder
100g caster sugar
3g salt
100g vegetable oil - i used canola oil

6 egg whites
1g cream of tar tar
100g sugar
50g of strawberry oreo - cut into tiny bits
enough strawberry paste or pink colour


Method
- Preheat oven 150C
- Whisk egg yolks with sugar till pale in colour.. add in yogurt and also oil.. add in ur sifted flour, baking powder and also salt.. lastly add in pink colour (i used wilton gel) - set aside
- In another bowl.. whisk egg white with cream of tar tar till foamy.. slowly add in sugar a little at a time and whisk till soft peak.
- Scoop 1/3 egg white meringue and add to egg yolk mixture.. fold in gently. once combined.. pour ur egg yolk mixture into meringue and continue to fold in gently and lightly.. once mixed pour half of ur mixture into a 22cm tube pan.. sprinkle half of ur oreo.. pour the rest of ur mixture and lastly throw in the rest of ur oreo..
Bake it for 50mins.. once baked.. turn ur chiffon pan and once its cool.. take it out of ur pan..


Might hit the sack soon.  Did my groceries dash in Hamilton today, paid bills that cant be paid online, went to the chemist for my repeat medication....and I managed to squeeze in some time to go to Spotlight to get my cottons and wools.  Had a very long and tiring today and Jannah got a little car sick.  Luckily she knows how to hold a sick bag now, otherwise I have to wash her car seat and clean the car just like everytime she got car sick when she was younger.  

Have a great night everyone ;) TTFN........


Wednesday, April 18, 2012

Chocolate Caramel Banana Upside Down Cake


Salam to all,

I actually planned to bake something else for hb today....but bcos I spied with my little eyes 3 bananas almost going rotten in the fruit basket, I had a changed of plan.  Thinking mode was on just now.  Should I bake banana muffins....NO!!  Banana cupcakes....Boring!!  Banana Bomb...no one else eats them except me!!  Banana pancake...Don't feel like pancakes!!  I suddenly remembered that someone posted a banana cake recipe that I've never attempted before.  So, I went on my blog and taaa daaa.....I decided to give June's upside down banana cake recipe a try.


When the cake came off the baking pan, I was actually quite disappointed with the look of my cake.  It was kinda ugly :(  I was so tempted to cut a slice to give it a try and wasn't even motivated to photo the cake haiiizzz.  I changed my mind after I finished with my cooking.  I only made quiche for dinner today and it was still a little early for dinner.  As there was some time to spare before dinner,  I took photos of this cake.....while waiting for the quiche to cool down.


June did indicate to serve the cake warm.  Warm aye....what should we serve a warm dessert with??  Ice cream and chocolate sauce of course ahakkksss.  Why not add more calories to the ones that are already stored in my body hehehez.  While taking the photo,  I had a bite of the cake.  Oh me oh my, looks can be so deceiving.  The cake was sooooooo soft!!  It was like eating sponge pudding, no chewing required....it melts in ur mouth.  The caramel, the banana and the soft chocolate cake was a match made in heaven yummmo!! The 3 of us shared a slice of this cake with ice cream cos I didnt want to spoil our dinner.  In the end hb had the most and Jannah cried.  I had to dish out a small serving for her hmmmzzz.


Source : June @ Amateurish Passionate Baker Wannabe
Adapted From : Cake Keeper Cake

 For The Topping :
1/2 cup (1 stick) unsalted butter
3/4 cup packed light brown sugar
3 ripe bananas, peeled and cut into 1/4-inch thick slices

For The Cake :
3/4 cup plus 2 tablespoons unbleached all-purpose flour
6 tablespoons unsweetened Dutch process cocoa powder, sifted (I used Varlhona)
3/4 teaspoon baking soda
1/4 teaspoon salt
6 tablespoons (3/4 stick) unsalted butter, softened
1 cup granulated sugar (I added 3/4 cups)
2 large eggs
2 tsp vanilla
2/3 cup buttermilk


Make the topping :
Preheat the oven to 350F. Grease a 9-inch round nonstick pan and dust with flour.
Heat the butter in a medium saucepan over a medium heat until foaming. Whisk in the brown sugar, turn the heat to low, and cook, whisking, for 2 minutes. Scrape the mixture into the prepared pan and smooth with a spatula. Arrange the banana slices in concentric circles on top of the sugar mixture. Set aside.

Make The Cake :
Combine the flour, cocoa powder, baking soda, and salt in a medium mixing bowl.
Combine the butter and granulated sugar in a large mixing bowl and cream with an electric mixer on medium-high speed until fluffy, about 3 minutes.
With the mixer on low speed, add the eggs, one at a time, scraping down the sides after each. Turn the mixer to high speed and beat until the mixture is light and increased in volume, about 2 minutes. Stir in the vanilla.
With the mixer on low, stir in 1/3 of the flour mixture. Stir in 1/2 of the buttermilk. Repeat with the remaining flour and milk, ending with the flour. Scrape down the sides of the bowl and beat the batter on high speed for 30 seconds.
Pour the batter over the bananas, gently spreading it into an even layer.
Bake until a toothpick inserted into the center comes out clean, 40 to 45 minutes. Transfer the pan to a wire rack and let stand for 5 minutes. Holding the pan and a plate together with oven mitts, immediately invert the hot cake onto the plate. If necessary, replace any fruit stuck to the bottom of the pan. Let the cake cool for 20 minutes and serve warm, or serve at room temperature. Store uneaten cake in a cake keeper, or wrap in plastic and store at room temperature for up to 2 days.


We luv this cake and me and hb already planned to substitute the fruits with apples, peaches and even durian next time hehehez.  Yeah right durian.....dream on Anie ZZZZZ.  
Be safe u olls ;)  TTFN........

Monday, March 26, 2012

Peanut Butter & Banana Pound Cake With Nutella Glaze


Salam to all,

I have to agree with the tv show 's quote 'Kids Say The Darnest Thing'.  That's what happened to us today.  Me and hb really had a good laugh while we were having our dinner just now.  We were watching the current affairs show on tv and the topic today was : Are NZ Employer Racist?  There was an online discussion on facebook and the presenter read one of the feedback.  I quote this from the current affair's website "Sorry that you call Yik a New Zealander as whether he was born here or not, he is not a kiwi in our eyes - excuse the pun.  I would like to think Maori or European"..... then the tv changed to another channel cos we booked a programme that we wanna watch.  Hb goes "Yeah right...what about my daughter??  She's half Maori and half Malay and she's born here.  She is a kiwi."  Suddenly we heard a response from Jannah that made us burst into laughters "I'm not a kiwi....I'm a UNICORN!!"  Adeehhhhh.......Jannah, Jannah LOL!!!

While I was accompanying Jannah in her room to sleep ealier....she said something silly again that made me laugh.  "Mama.....tangan Jannah pening arh."  I had to ask her again "Apanya yang pening?"  She replied "Tangan Jannah lah pening....dah sakit.  Nak kena pergi Xray....doctor nak tengok the bones.  Mama gosok kasi tak pening lah."  Adoooooiiii pengsan, pengsan!!  Tangan pun boleh pening wahahahahaz!!! 

Ok lah let me tell you story of this cake.  Actually, I took a break from cleaning this morning.  I was still in the midst of revamping Jannah's room.  It is still topsy turvy as I moved the furniture around again.  She growled me for making her room messy....how ironic is that hahahaz.  Usually, its the other way round.   Oh well, it's only half messy at the moment.  The other half of the room is sparkling clean.....no dust, no cobwebs ok little gal yg tangan pening!!!   Before I make this cake....I actually made some nutella cheese cupcake which I gladly donated them to the bin.  Dunno what went wrong with the recipe.....Yes!!  I blame the recipe nyehahahahaz.  As the chocolate smell from the not so good cupcakes was still overwhelming the house, I decided to bake again as I have this dissatisfied feeling sort of lingering around me.


I choose to bake another  recipe using peanut butter since I want to finish the smooth peanut butter.  A big fan of peanut butter I am but when it comes to peanut butter sandwich....I choose the super crunchy peanut butter instead of smooth.  Nutella.....I have it in abundance.  Bought 2 750gm jars when it was on clearance last month.  Verdict......we luv this cake ;) whats not to like about peanut butter, banana and nutella.  When they are combined together, I can eat until my kepala pening wahahahaz!!!

There was too much cake batter to fill up 1 bundt pan.  I used the mini bundt pan for the rest of the batter and got 4 pieces.  And......don't ask me where the marble swirl is cos I dont know where it's currently hiding at hmmmmzzzzz.


Ingredients
1 1/2 cups (3 sticks) butter, room temperature
1 cup smooth peanut butter, divided
2 3/4 cups sugar
5 eggs
2 teaspoons vanilla
3 cups all-purpose flour
1 teaspoon salt
2 large bananas, mashed
1 cup Nutella, divided
2 tablespoons milk or water (optional)


Instructions
Preheat the oven to 325 degrees. Grease and flour a bundt pan.
In the bowl of your stand mixer, cream the butter and 3/4 cup of the peanut butter until smooth. Beat in the sugar, mixing until light and airy, around 5 minutes. Add the eggs, one at a time, mixing well between each addition. Stir in the vanilla.
Add the flour and salt to the mixer, all at once, and mix just until incorporated. Mix in the mashed banana on low.
Pour batter into the prepared bundt pan. Drop heaping spoonfuls of Nutella over the top of the batter, about 1/2 a cup. Using a butter knife, swirl the Nutella all throughout the cake to get a marbled look.
Bake the cake for 60 - 75 minutes or until the cake is golden brown and a tester comes out clean.
Allow cake to cool in the pan for 20 minutes, then remove to a wire rack to cool completely.
Heat remaining Nutella and peanut butter in the microwave in 10 second intervals to soften it up enough to drizzle. If desired, mix in a little milk or water to thin the glaze out.
Drizzle on top of the bundt cake.


One thing for sure, its gonna taste better tomorrow ;)  Have a blessed week ahead y'all....insyaAllah.  TTFN........


Monday, February 13, 2012

Prune Layer Cake


Salam to all,

How was the weekend peeps?  Anyone suffering from Monday blues today ahhhaakkkss??  Today, I finally get to officially use the KitchenAid mixer that a friend bought for me since last July *grins*  I am really thankful to my primary school mate whom I haven't seen for more than 20 years, got reunited through FB in 2008 and finally get to meet up in S'pore last year.  Thank you Yat Salleh ;) not Yat Maria of Easybakes eh.....hehehehez :ppp.  Not only Yat (Salleh lah >.<) carried the KA for me but also tonnes of other things that I bought on Amazon like the Nordicwares, Silpat, Wilton Cake Deco Set, Fitflops and many more to list here.  I was going crazy shopping on Amazon bcos the items I bought were shipped free to Yat's address and the weak USD.  By the time I reached S'pore, my shopping list was getting lesser but I was glad that I  still managed  to go to TOTT and Phoon Huat to get other bits and pieces for baking.  The baking speciality stores here are bloody rip offs!!!! :(


It was once seated in this dark and lonely corner :D


My KA travelled a very long way from the States to an APO address to Singapore and finally to NZ.  Since the day it was bought, it wasn't even tested if its gonna work *slaps forehead*  I only took it out of the box, placed it on my tiny counter top last month.  Only last week, that I managed to drag myself to buy a step down transformer online....yeah online hahahahaz.  I was kinda sceptical, worried and also unsure, doesnt that means sceptical also ahaaakksss at first bcos I don't want to get a transformer that is as big as a cinder block and weighs a tonne.  I got no room in my tiny kitchen or should I say non existence kitchen or even in the cupboards to store it and I dont want it to be a hassle for me to take it out and put it away after using it.  I know I should have done some research before lugging the KA home...I was lazy.  Luckily the transformer was only 13cmx6cmx6cm and doesnt weigh more than 1.5kg *grins some more*  Thank you also to June for sharing the info of using a transformer for a KA.  I was gonna get a higher wattage one and was told that a 500w was sufficient.   Phewwww saved some money there ;)


Before I turned on the KA, I was reciting Bismillah like a million times.  I was so scared that it might explode hahahahaz.  Alhamdullilah, all went well and I am stoked at using this KA.....very, very stoked.  The machine is so much more quieter compared to using my Kambrook hand mixer.  For now, I am still gonna keep the hand mixer for small baking projects and am thinking of getting another KA mixing bowl in the near future.  For once, I thought.....I can do clean ups while the mixer is mixing but then being a NOOB I was so 'jakun' and stared at the wonderful thingy mixed my batter instead.....talk abt productivity & multi tasking aye LOL!!!!


A noob mistake for not using the shield >.<  The shield is still wrapped in bubble wrap and I couldn't be bothered to unwrap it at the moment :ppp


I had to return a friend's plate and.......this is what was baked today using my kitchen beauty weeeeiiiiiiii ;)  I also managed to scrape the batter to make it 11 layers instead of 10 ;)  Luv this cake, it is really, really moist and yummilicous luv it luv it luv it.

Source Rima @ Bisousatoi


Ingredients
(A)
250g butter (I used Anchor)
80g condense milk
1 tsp mix spice
1/2 tsp vanilla powder (I added vanilla extract instead)
80g golden syrup


(B)
15 egg yolk
3 egg white
120g castor sugar
80g superfine or HK flour (I used AP flour)
1 tbsp ovallete
20 ml cold water

(C)
a few drop of yellow colouring
150g pitted prunes (I used 250g minus 2 pieces that went into my mouth hehehez)
Melted butter


Method
1.Greased a 8x8x3 pan.. preheat oven 180C
2. Whisk A on high speed for abt 7mins or till thick and creamy.. put it aside
3. In another bowl.. Whisk B on medium speed for 10mins or till thick and fluffy
4. Add butter mixture (A) into egg mixture (B) and continue to whisk till well blended
5. Add in yellow colouring
6. Separate batter into 10 portions... abt 90g each layer
7. Spread a portion of batter evenly into pan
8. Tilt pan left and right to level batter or use back of ur spoon. Grill for 5 minutes or until golden.
9. Remove from oven and press cake layer to remove excess air. Brush layer with melted butter and spread another portion of batter over the cooked layer, tilt pan to level batter and arrange flattened prunes onto batter. Grill for 5 minutes or until golden. (My luvly oven required 7 mins for the first 5 layers and 6 mins for the next 6)
10. Alternate step 8 and 9 until batter is finished.
11. Bake last layer using upper and lower heat for a further 10mins .. (use aluminium foil to cover the top so as to prevent the top fm turning too dark)


Have a great week ahead everybody ;) TTFN.....

Sunday, January 29, 2012

Whipped Cream Cake


Salam to all,

The last 2 groceries shopping, I've been buying 500ml bottle pure cream.  I don't even know why I bought it.  The bottle from the last groceries shopping was dumped into the bin bcos it has expired.  This other one that I have in the fridge, expires tomorrow.  Next grocery shopping, I'll make sure that my hands won't grab any more cream.  Hmmmzzz maybe I should grab the 200ml one instead, just in case I need it ahaakkksss. 

Last night, I googled for recipes that requires heavy cream/pure cream as one of the ingredients.  I am glad that I stumbled upon this recipe.  It was an easy peasy recipe to follow and doesn't require much ingrdedients either.  In an attempt to finish whats left of the cream & also for the cake to finish quickly, I drizzled chocolate ganache on it.  The cake on its own tastes ordinary but with the dark chocolate ganache, it taste extra ordinary....ohhhh yummmzzz.  I can't stop eating it hellllpppppp!!!!

Ok nothing else to blog about.  I am gonna prepare my sambal for my nasi lemak.  Gonna have nasi lemak with sambal, grilled chicken, fried anchovies, peanuts and omelette on banana leaves for dinner tonight.  Oooppsss I have to do the dishes first, Jannah can help me dry them now....finally I have a helper ;)


Source : Angie Tee @ Sea Salt With Food

Ingredients

225 g (8oz/2 Cups) Cake Flour, sifted - I used all purpose flour
2 tsp Baking Powder
¾ tsp Sea Salt - I used table salt
348 g (12.3 oz/1 ½ Cups) Cold Heavy Cream - I used Anchor Pure Cream
3 Large Eggs, at room temperature
1 tsp Vanilla Extract
225 g (8oz/ 1 Cup plus 2 Tbsp) Superfine Sugar


Method

Preheat the oven to 375˚F/190˚C. Coat a 10-cup fluted metal tube pan with baking spray and flour. Shake off the excess flour.

In a medium bowl, whisk together the cake flour, baking powder, and sea salt.

Using a stand mixer fitted with the whisk batter, whip the cream, starting on low speed, gradually raising the speed to medium-high as it thickens, until stiff peaks form.

In another bowl, whisk the eggs and vanilla until just combined.

On medium-high speed, gradually beat the egg mixture into the whipped cream. The mixture will thicken into mayonnaise consistency. Gradually beat in the sugar. It should take about 30 seconds to incorporate it.

Then add half the flour mixture into the cream and, with a large spatula, stir and fold in the flour until most of it disappears. Add the rest of the flour and continue folding and mixing until all traces of flour have disappeared. Scrape the batter into the prepared pan. Run a small metal spatula through the batter to prevent large air bubbles, avoiding the bottom of the pan. Smooth the surface evenly.

Bake the cake for about 30 to 35 minutes, or until a wooden toothpick inserted between the tube and the side comes out clean. Let the cake cool in the pan on a wire rack for 10 minutes. With a small metal spatula, loosen the top edges of the cake and invert the cake onto a wire rack that has been coated lightly with nonstick cooking spray. Cool completely. Lightly dust the cake with icing sugar, if desired.


Chocolate Ganache (Optional)

125 ml cream
150g  dark chocolate, chopped

Place the cream and chocolate in a small saucepan over low heat and stir until melted and smooth. Set aside and allow to cool to room temperature.
Spread ganache over the cooled cake to serve.


Pssttt....Jannah had the cake with a fork and a knife.  Hmmmzzz macam-macam lah this little girl.  Enjoy the rest of ur Sunday peeps ;) TTFN....

Saturday, December 17, 2011

Easy Peasy Fruit Cake


Salam everyone,

The weather here has been gloomy for almost a week now.  The current season is summer but it feels like autumn right now.  It's been raining and the temperature been very cool.  I am not complaining cos I am not an outdoor person.  In fact I really enjoy this kinda weather, just that its a nuinsance when I want my washing dry hehehez :D complain....complain....

Anyway, we got invited to Auntie Eton's (one of the expat Singaporean that I am really closed with) house for a kenduri.  Her mom passed away at the age of 87yrs old (if I am not wrong).....40 days ago.  I made 3 different kind of desserts to be brought over to her house later. 

The first one that I made was this yummy fruit cake.  Its so easy to make, I call it a 1 pot wonder cake hehehez.  I've made it like almost 10 times before, this is the 1st time that I am putting it up in this blog.  As usual, hb whom is not a fan of dried fruits luvs this cake long time ahaakkkzzzz :p


Ingredients :
150gm butter
175gm caster sugar
1/3 cup water
175ml fresh milk
250gm mixed dry fruit
2 tsp orange peel - I did not add
1/4 tsp nutmeg powder - I did not add
1/2 tsp cinnamon powder - I did not add
1/4 tsp cloves powder - I did not add
2 eggs
1/2 tsp sodium bicarbonate
250gm all purpose flour

Method :
Boil water with sugar until dissolved.
Add butter, fresh milk & mixed fruit and boil further until butter melts.
Remove from heat and let mixture cool down.
Add egg into mixture.
Sift flour, baking soda & spices and add into the mixture and mix well.
Pour into a greased 7x7 inch pan and bake in a preheated oven for an hr.

Note : Junjs11 did not indicate the oven temperature.  I baked the cake in a 160 deg C oven for an hr. Adjust the temperature of your oven accordingly.


Have a good weekend everyone ;) Take care....

Monday, December 5, 2011

Sultana Butter Cake


Salam to all,

So....how was the weekend everybody??  It really flies too quickly aye.  Too quickly that we will be saying goodbye to 2011 soon, yeah very soon.  Just gonna post this quick entry before I start cooking for dinner.  It will be roast chicken with roast potatoes and kumaras (maori sweet potatoes) tonight.  Jannah must have enough of curry...she requested for chicken soup today hehehez.

Saw this sultana butter cake at Yat's the other day and I so couldnt resist it.  Made it today and it was oh so yummy.  Hb is not a big fan of dried fruits and he ate 2 slices and said that he's gonna have more after dinner.  I am gonna keep a few slices in the fridge and enjoy them with a cuppa tomorrow.  I am sure that is gonna taste yummier after being kept a day....reminds me of the Sara Lee pound cake yummmzz.

Hey babe, I tried to leave a comment at ur blog to ask what size baking pan did u use but I don't know why I can't leave a comment.  I must have played around with my google settings.  Will try to figure out what's wrong with the settings if I am not lazy later.......hehehez.


Sultana Butter Cake
Source :  Yat @ Easybakes Tks babe for sharing this recipe ;)

Ingredients:

5 Eggs
180 Sugar
200g Self Raising Flour, sifted (I used all purpose flour and added 2 tsp of double action baking powder)
250g Butter, soften
1/2 teaspoon Vanilla Essence
80g Raisin, soaked to soften and dried (I added 100g of raisins and soaked in orange juice & later coat them with some flour)


How to do it: 
Preheat oven at 170C
Grease baking tin.
Beat butter and sugar till creamy and light.
Add egg one at a time and mix until well combined.
Add flour and fold in slowly.
Mix in vanilla essence and mix evenly.
Lastly add sultanas & fold just so.
Pour mixture into baking tin.
Bake in reheated oven for 45 - 50 minutes.
Remove and cool on rack.

Read more:
http://yateasybakes.blogspot.com/2011/12/sultana-butter-cake.html#ixzz1fdHM5Rvo

Take care everyone and enjoy the rest of the week ;)

Thursday, February 10, 2011

Chocolate Cheese Layer Cake

Weather for Te Awamutu today
Season :
Summer
Forecast :
Chance Of Rain
Temp : 27°C | 17°C
Current :
Mostly Cloudy With High UV(7) Warning
Temp : 27°C


Salam, Kia Ora...

Last week I went to the supermarket to get some milk.  I like to browse the shelves whenever I am at the supermarket, sometimes an easy task of getting milk will take me 30 minutes in there...hehehez.  As I was browsing the chiller section, I saw the Kraft Philadelphia cream cheese reduced to clear for only $1.49 each.  The price was cheap bcos the expiry date was on 9th Feb that was in 6 days time.

I was hesitating whether I should buy the cheese.  In the end I grabbed 1 block...hehehez I just couldn't resist it.  Hesitating bcos I knew that I am still in my lazy mood, not knowing if I'll be able to use it before the expiry date.  Only yesterday that I finally gather some courage and energy to use the cream cheese ^_^.  I've been wanting to eat and bake a chocolate cake for 2 weeks now and decided to finally bake one yesterday.  I like being lazy bcos I don't succumbed to temptation easily I reckon....ahaakkkss.

This recipe has been bookmarked for awhile now.  I thought why not give it a try since I have all the ingredients at home yesterday.  I made the layers quite thick bcos I couldn't be bothered to slave in front of the oven for a long period of time.  I just want the cake to finish quickly and yummiliciously...LOL!!  We really love this cake, the cheese and chocolate flavour blends well together and it wasn't too sweet....yummmzz yummmzz :ppp love it.......


Source : Kek Warisan Bonda.  Thank you Neena for sharing this recipe ;)


Chocolate Cheese Layer Cake


Ingredients A :
12 egg yolks
6 egg whites
360 gm sugar (I only used 300gm)
300 gm flour Hong Kong (I used standard flour)
2 tablespoons ovalette


Ingredients B :
For Cheese

250 gm cream cheese
4 tablespoons condensed milk
1 teaspoon lemon paste


For Chocolate
250 gm butter
4 tablespoons condensed milk
150 gm cooking chocolate - melted
1 tablespoon chocolate paste


Method :

1. Whisk A until fluffy.
Note : 
- If using hand mixer mix beat all ingredients except flour until fluffy 1st than add flour.
- If using stand mixer like KitchenAid, u can dump all the ingredients together and whisk till fluffy.
2. Divide the batter into 2 equal amount.
3. Beat cream cheese ingredients until creamy and add it into half of mixture A.
4. Beat butter & sweetened condensed milk until creamy then add into the other half of mixture A.  Add the melted chocolate into the mixture and finally the chocolate paste.
5. Prepare a baking pan 9 "X9" x3 ". Grill the cake layer by layer, alternating the chocolate and cheese mixture until finished.
6. Chill in the refrigerator overnight before cutting.


NOTES:
I grilled the mixture layer by layer at 170 deg C for abt 7-8 mins.  For the last layer I baked the cake using the top and bottom heat for 15 minutes.


Me Te Aroha...With Love,
Anie ;)